Sets Management
The sets page is where you will spend most of your time doing updates. A set is the package of documents, including your protocols, that are served through the app. Sets are structured using Folders that contain files, all of which are customizable to your needs. Not only are sets used for current and future builds, they also provide a historical view of the files served in the app at a specific moment in time.
The Set configurator contains two panels: Set Version Picker and Contents Explorer
Contents Explorer
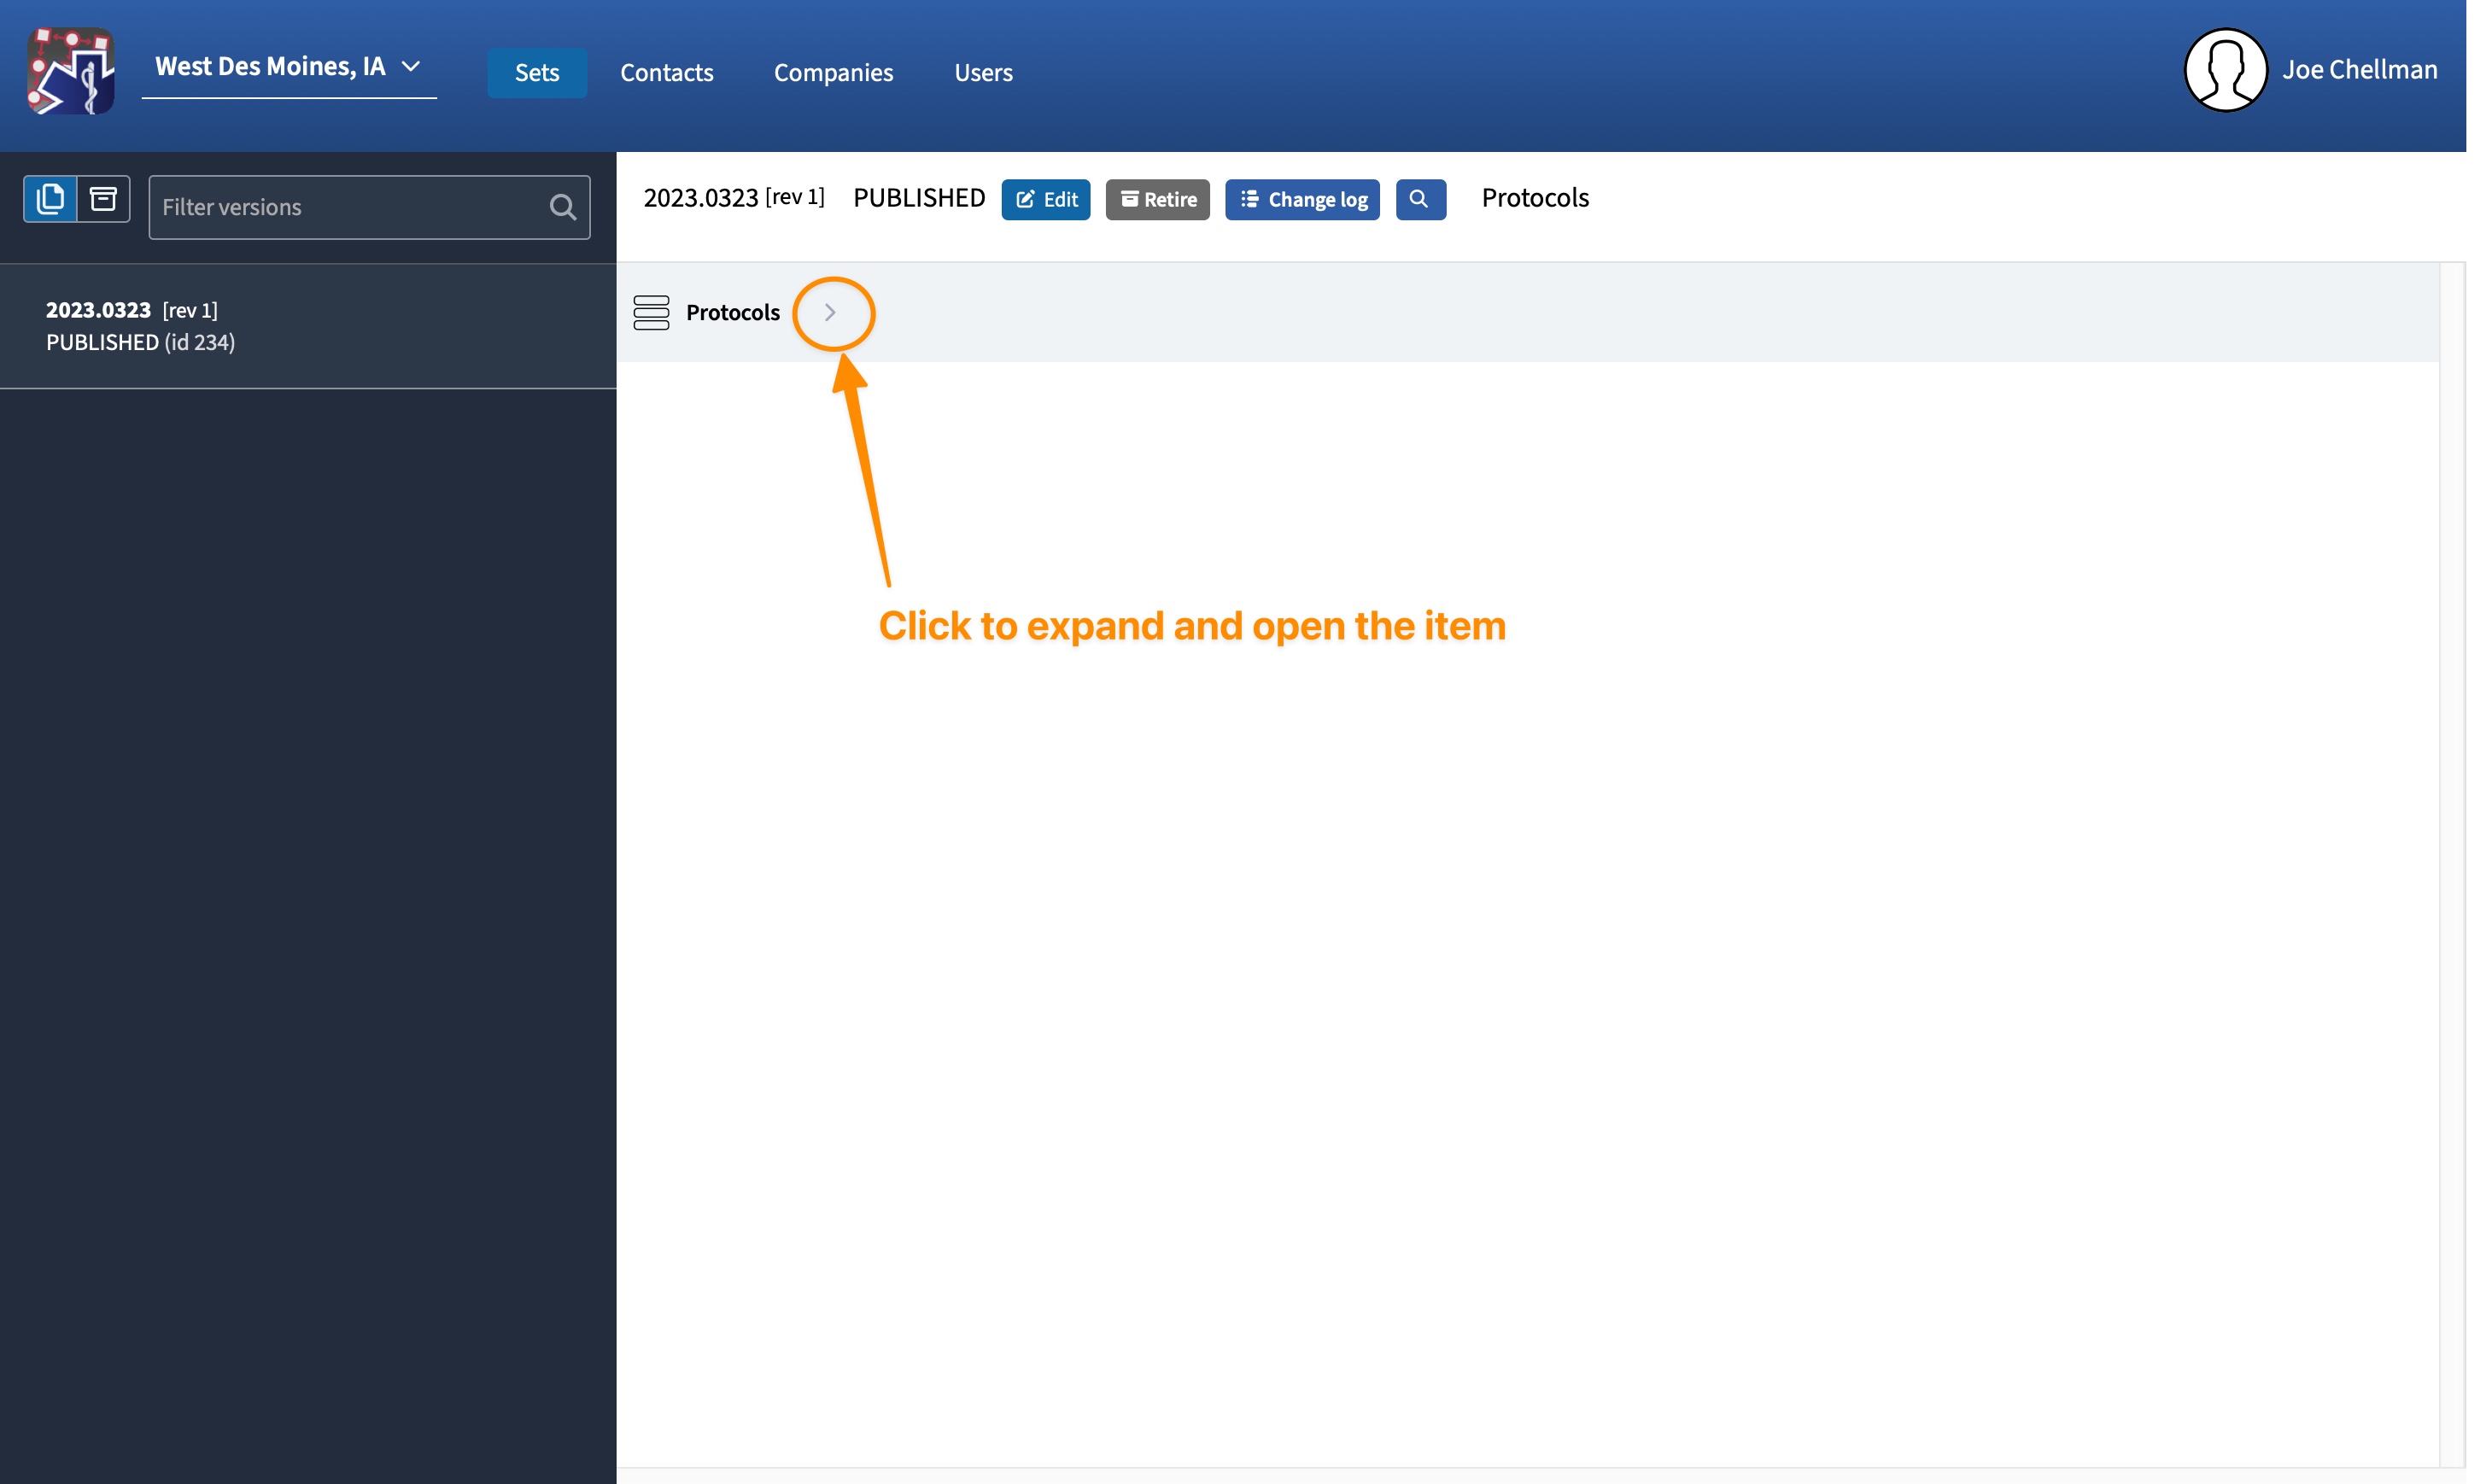
If you click on the “>” next to “Protocols” it will expand to show all the folders you currently have in the app.

You can expand those folders further to see more nested folders or files.

When you have selected a file, you can click “View” to open the PDF as it appears in the app. Beneath the “View” button is a URL specific to that document.
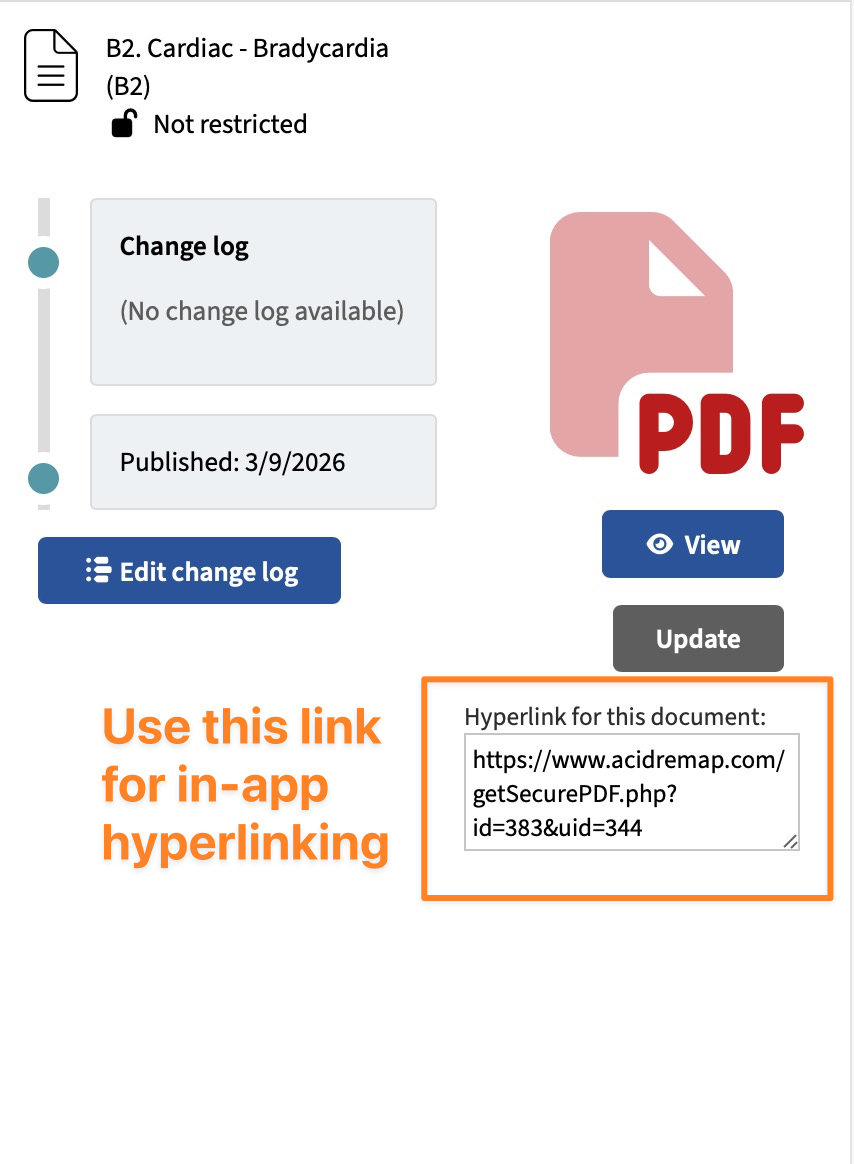
If you wish to add hyperlinks within your documents you should insert these urls into your files. The links will work with or without internet access once the set has been downloaded onto a mobile device. If you want, we can also provide you an excel spreadsheet that contains the links for all the files in your app, just email and ask.
Editing a Set
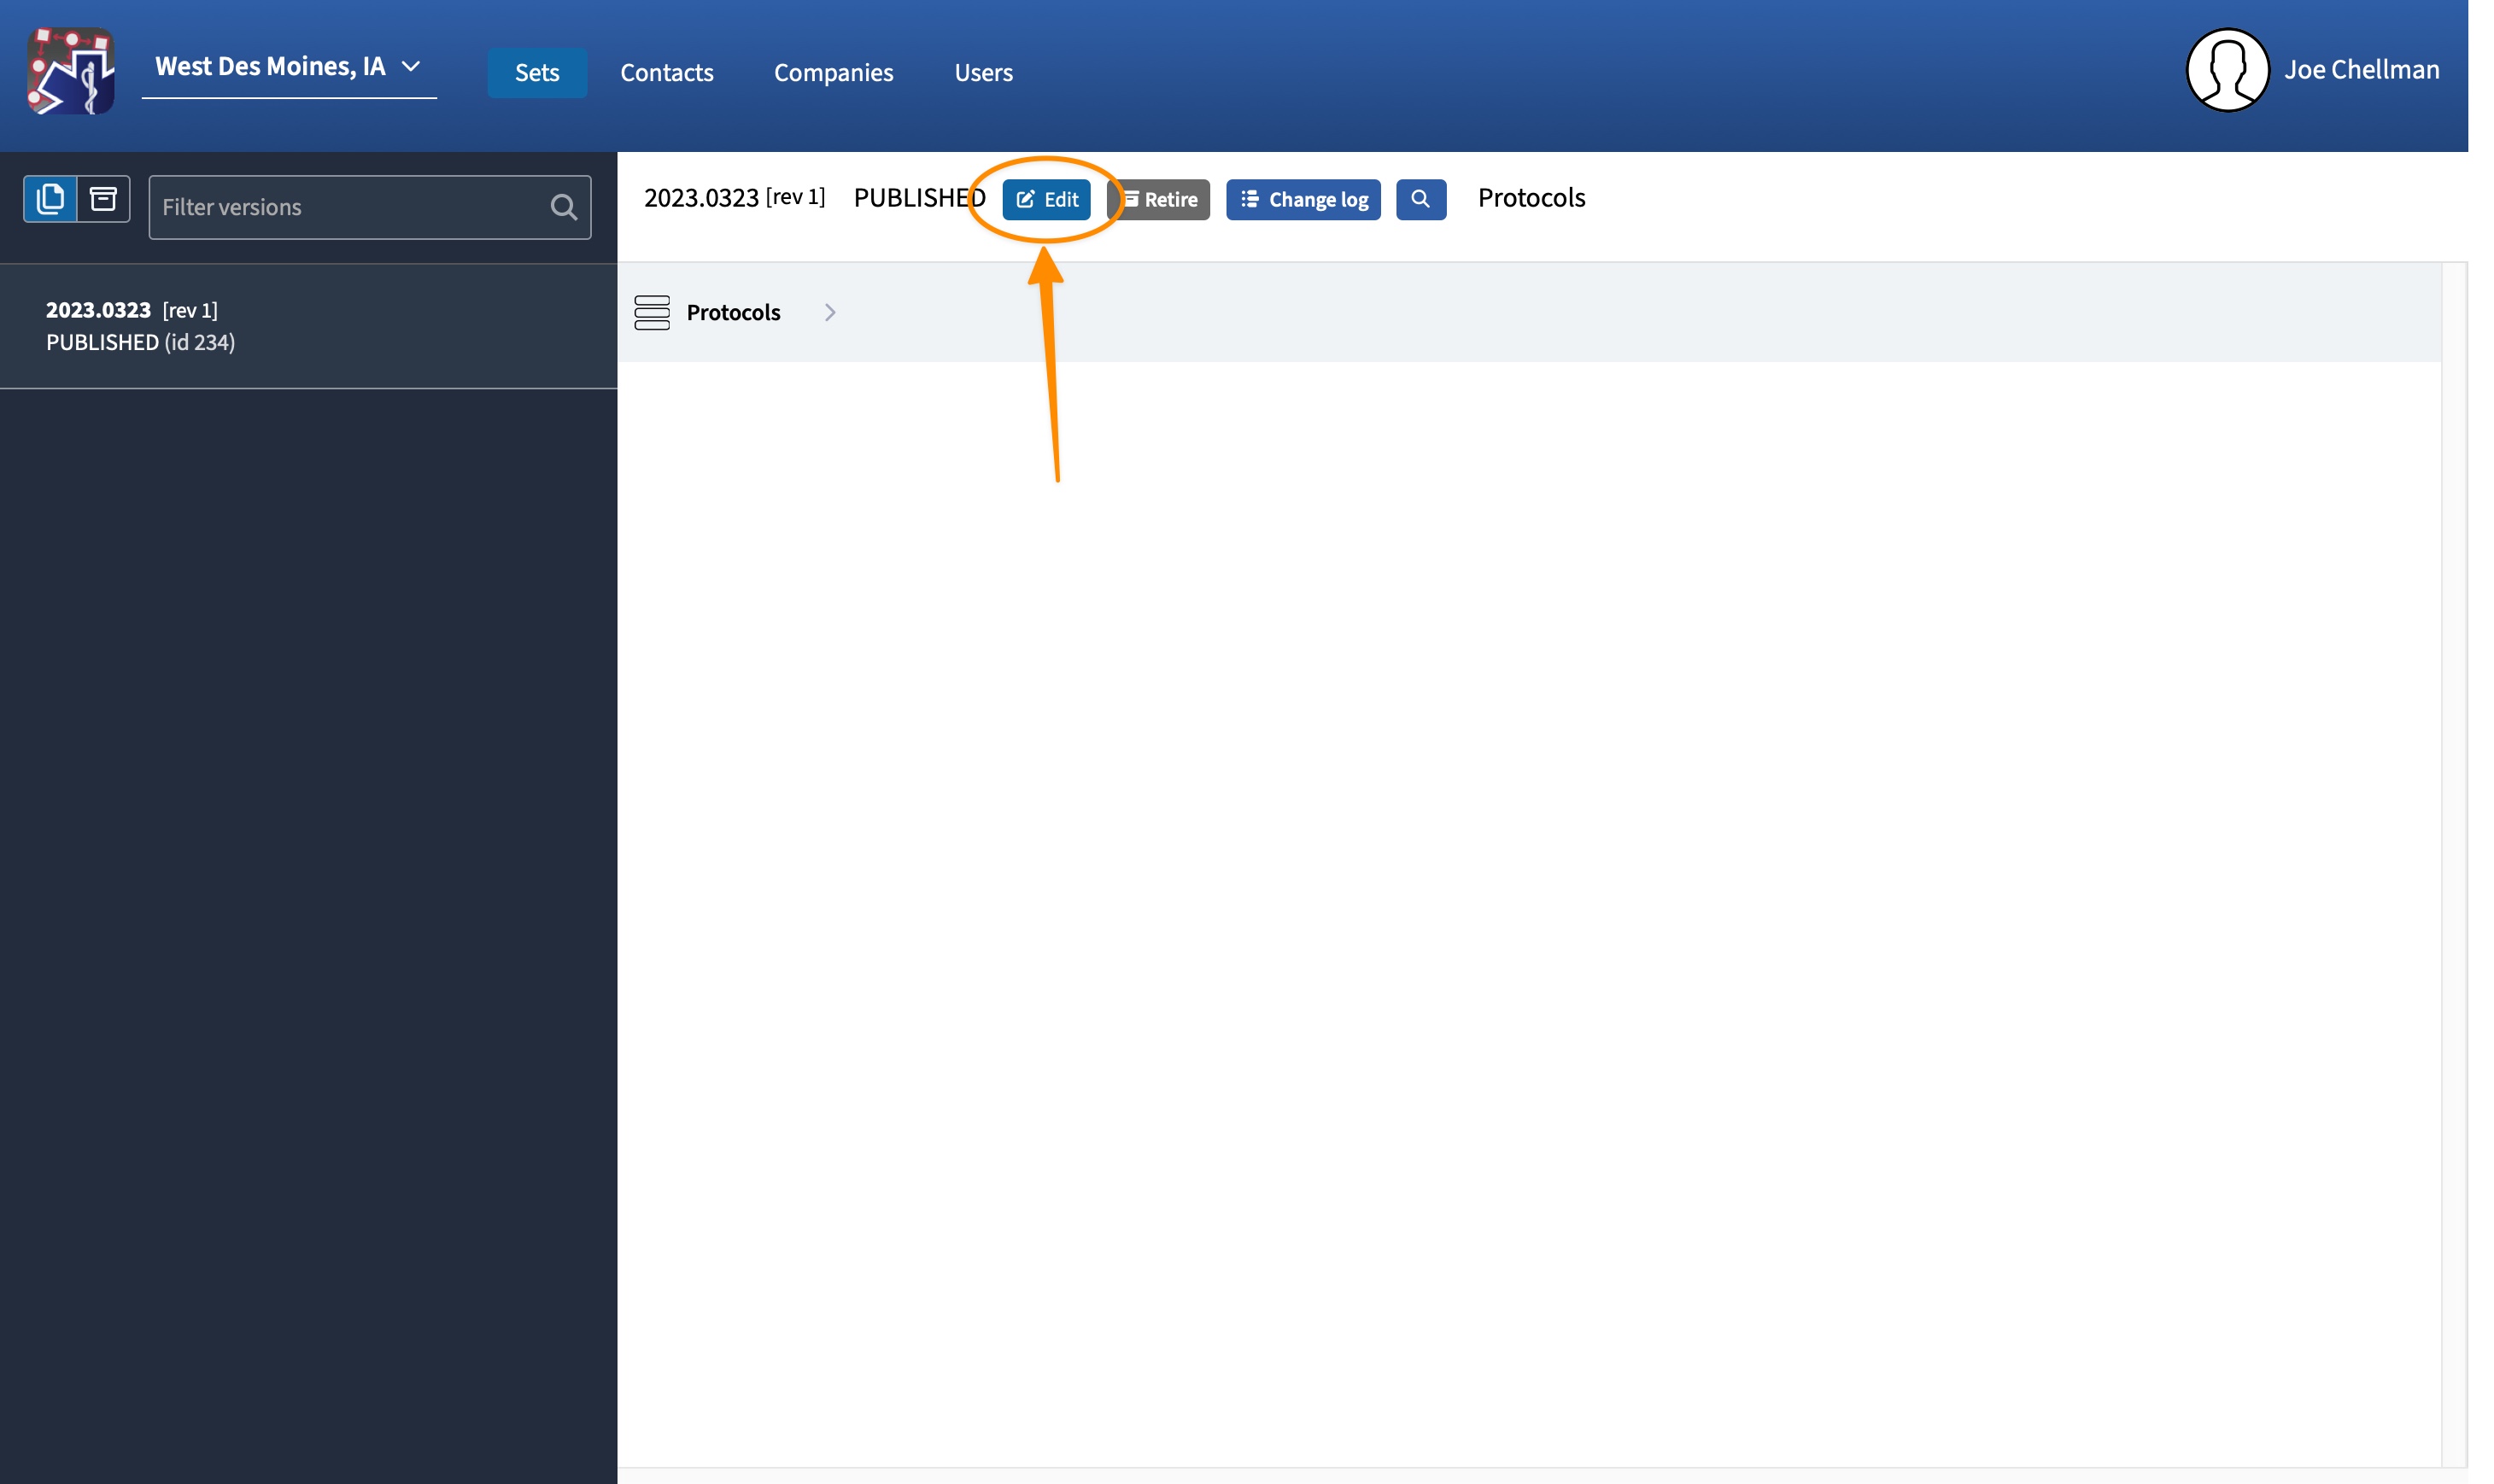
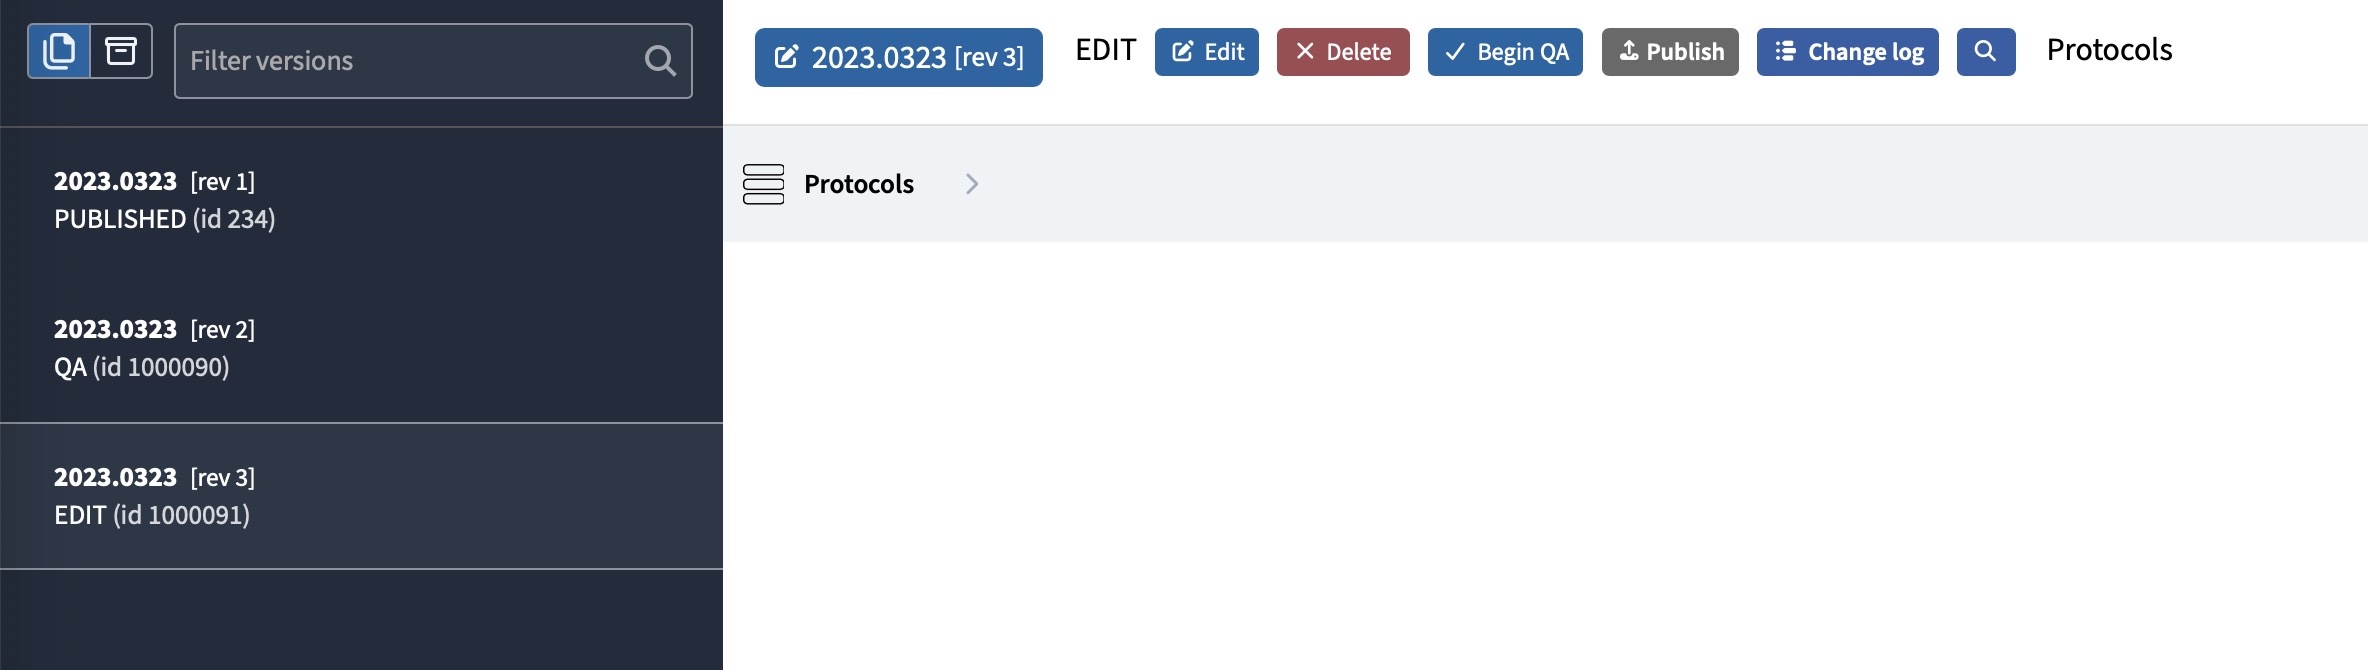
When you are ready to make a new update, click the blue “Edit” button on the main “Sets” page.
A pop-up window will appear where you can enter in your version number. You can set this number to follow your organization’s numbering system, or leave the defaults that are filled in. When ready, click “Save new version.”
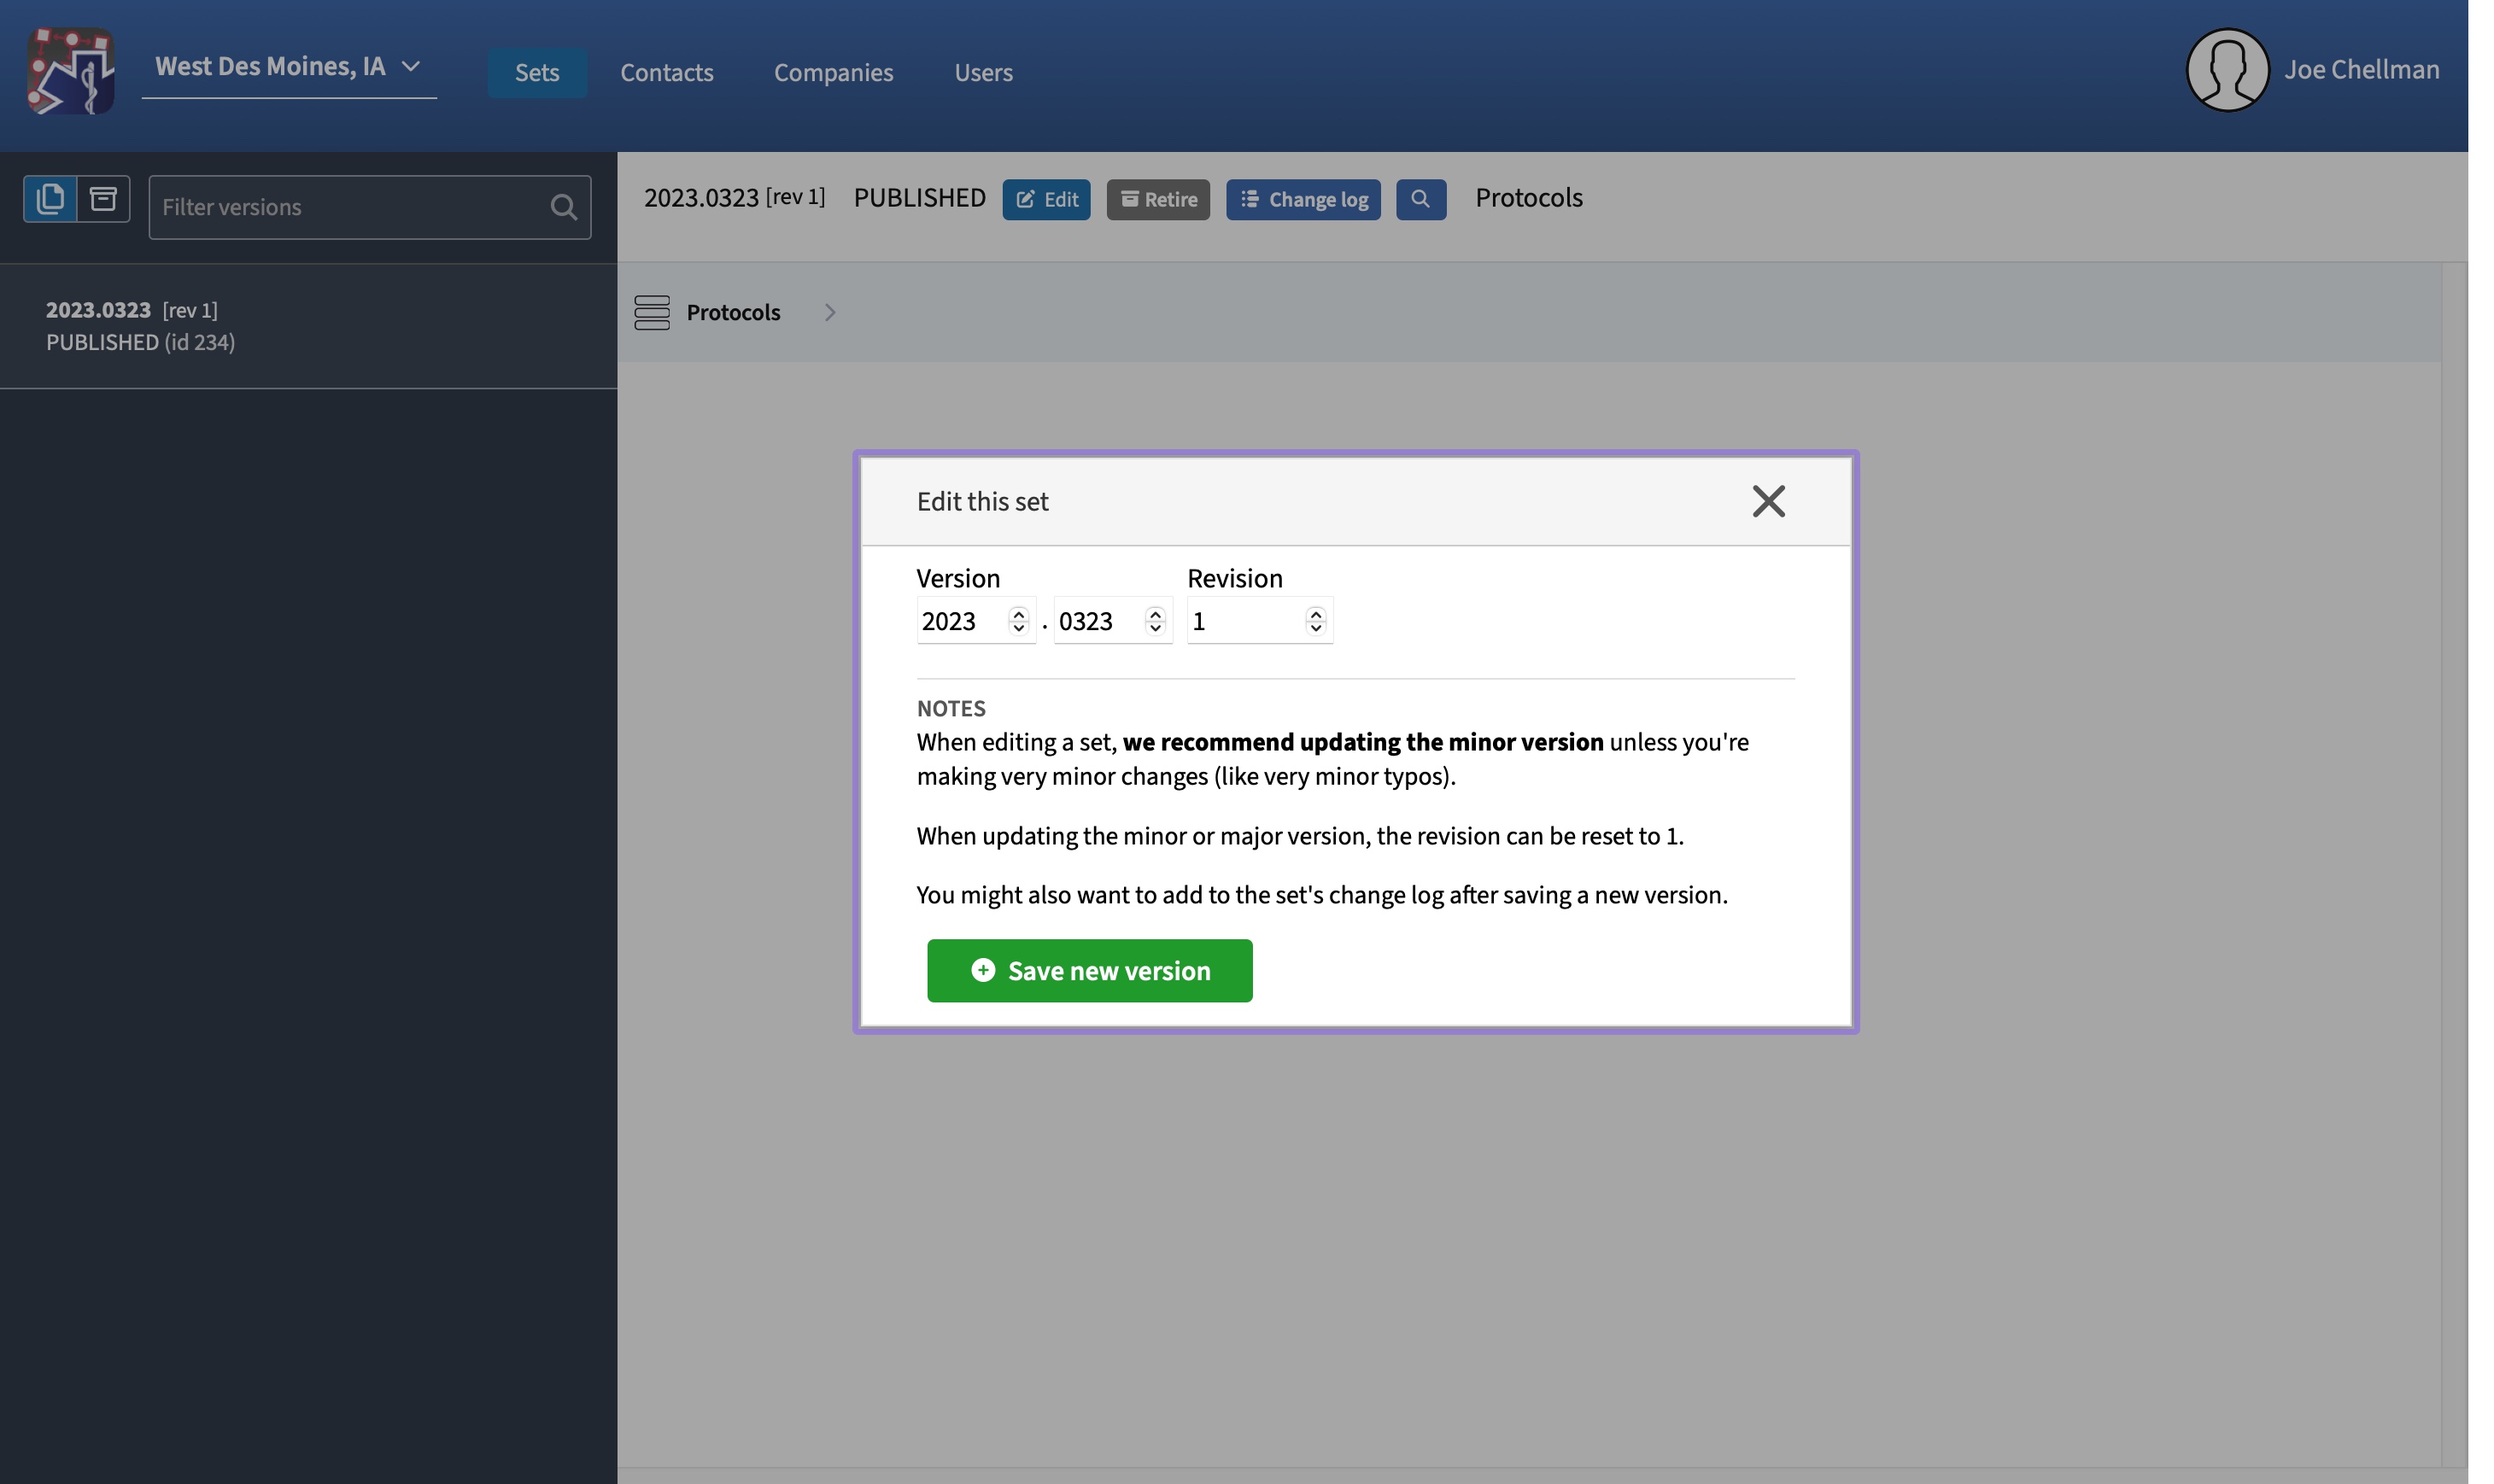
(Note if your system currently uses a version numbering system like Version 3.6, let us know and we will set the initial version number for you since all new versions have to be larger than the previous version.)
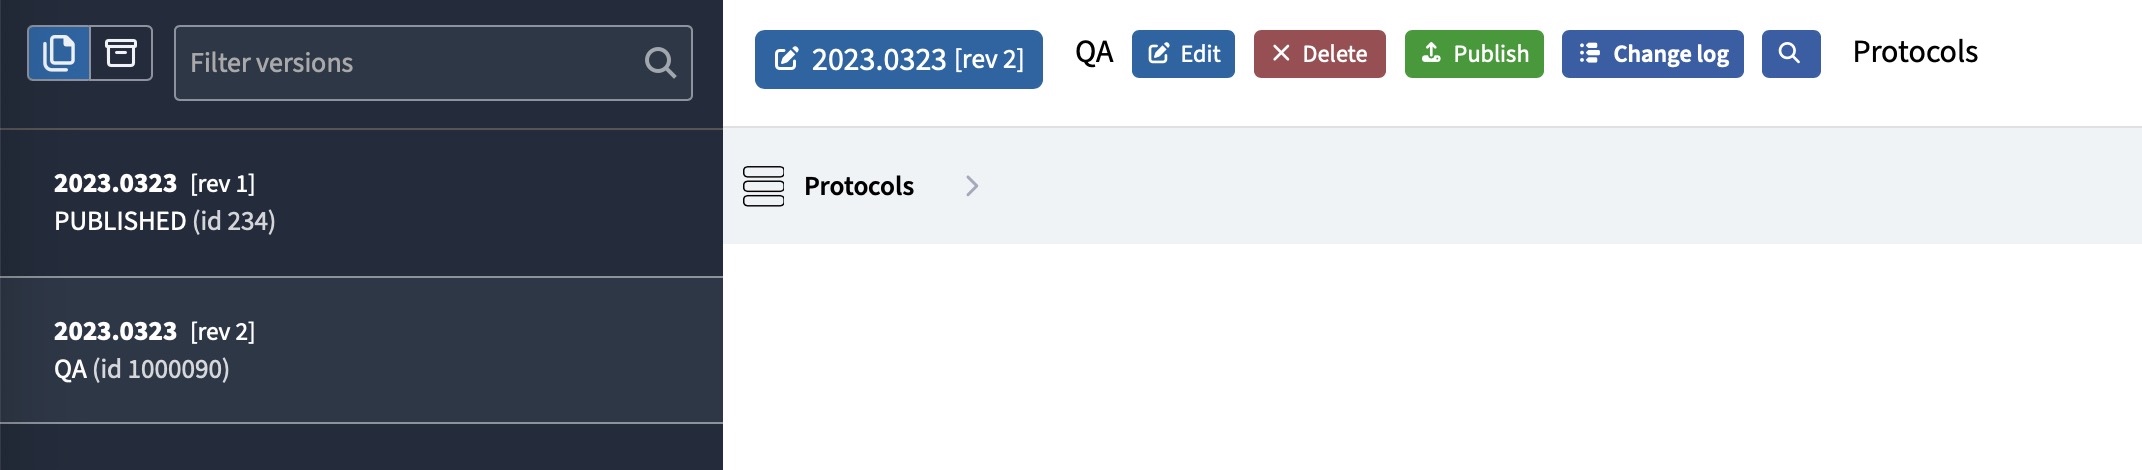
Once you have started a new version it will appear on the left hand side so you can toggle back and forth between the new update and the current version. If you decide you don’t need to update at this time just click the red “Delete” button and you can cancel the update.
Please note: you may only delete sets in Edit or QA mode. Deleting a set is permanent and cannot be undone, so be sure you really want to cancel before you do this.
Just like the live protocol sets, you can expand each folder to the individual files within. You can also click and drag files or folders to rearrange them. If you need to add a folder or file in a section, just click the green icon of a file or folder with a “+” in it.

If you aren’t adding any files and just updating current files, it is important that you don’t delete the old file and then add in the new one. This will change the URL to that document so any existing files that use that URL will no longer work. It will also erase any user notes they may have had on that entry.
Repeating this because it's important: Don’t delete an old file and then add in the new one. Instead, click the green “Update File” button on the file you want to update and upload the new PDF in place of the old one.
If you do accidently delete a file, you can find it in the “Trash” that will appear beneath “Protocols” in your edit set. Just open the Trash and restore the file.
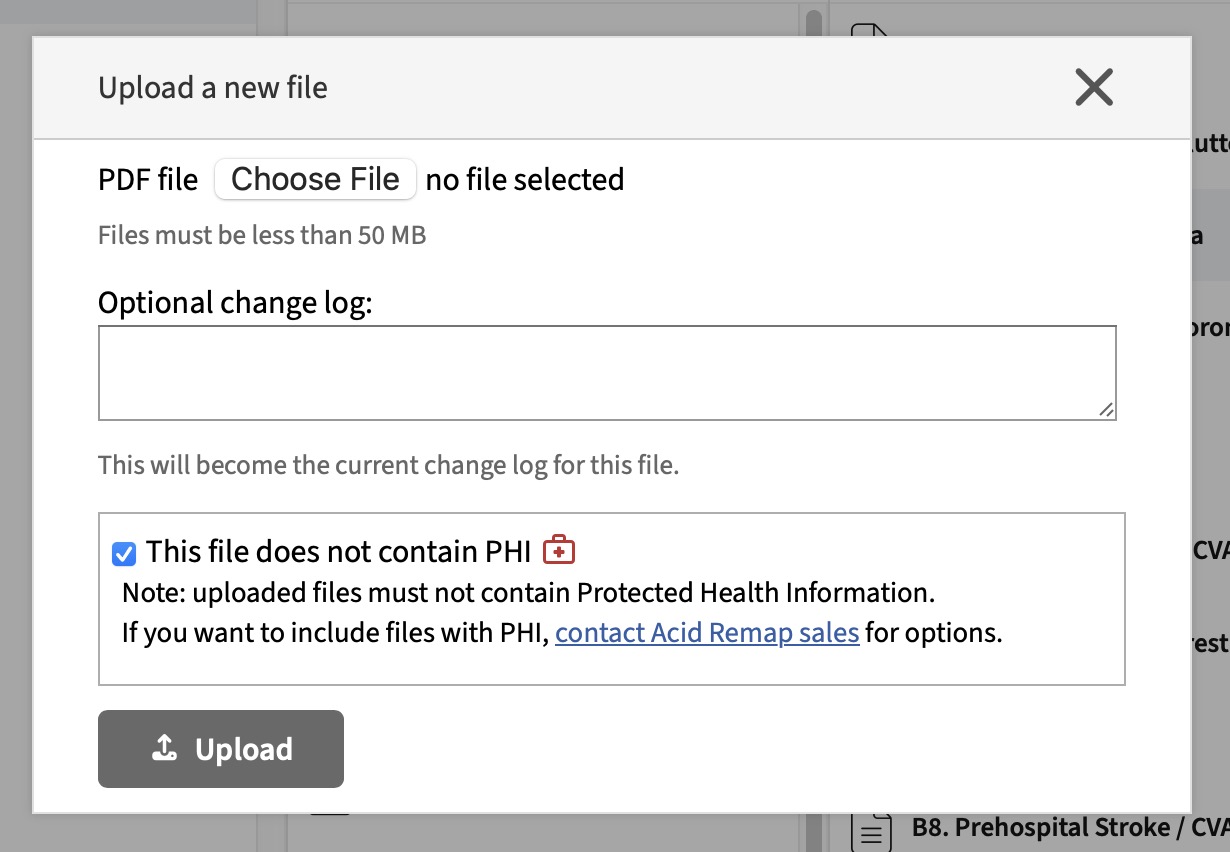
To update a file, click the green “Update File” button and then press the “Choose File” button in the popup window. Select the new PDF you want to upload, and press “Upload”. The file will be uploaded in the place of the old one keeping the unique URL. You can double-check that the correct file was uploaded by pressing the blue “View” button once the upload completes.
Note that, in most cases, it is required that files do not contain protected health information (PHI) and that they are in PDF format. If you need to upload files that contain PHI, please contact us. Handling PHI on your behalf requires an enterprise contract and business associate agreement (BAA).
When you click the “Edit” button on a file a pop-up will appear where you can edit the name of the file, its numbering system, and add restrictions as needed.
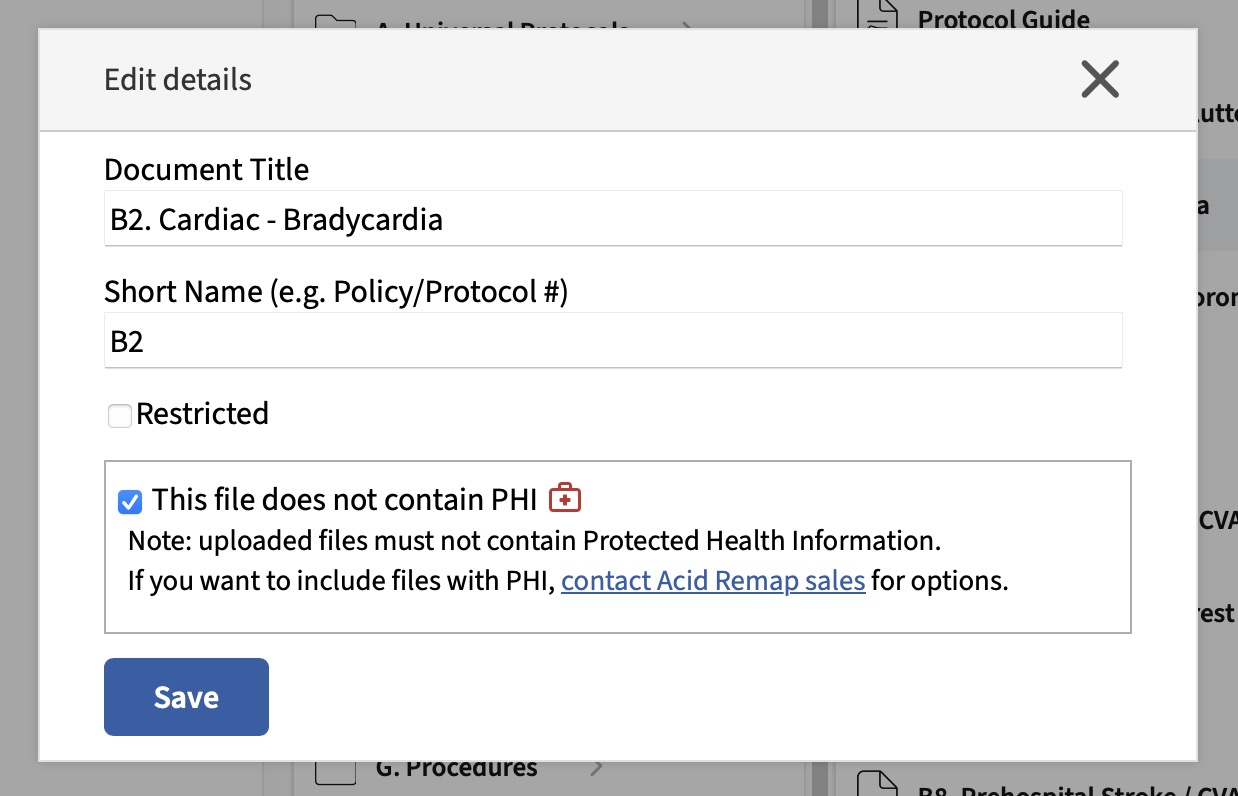
Once you’ve made your changes, just click “Save” and the changes will be saved.
If you need to move a file within a section, just drag it where you want, but if you want to move it to a different folder, you can click the blue “Move” button and a pop-up will appear.
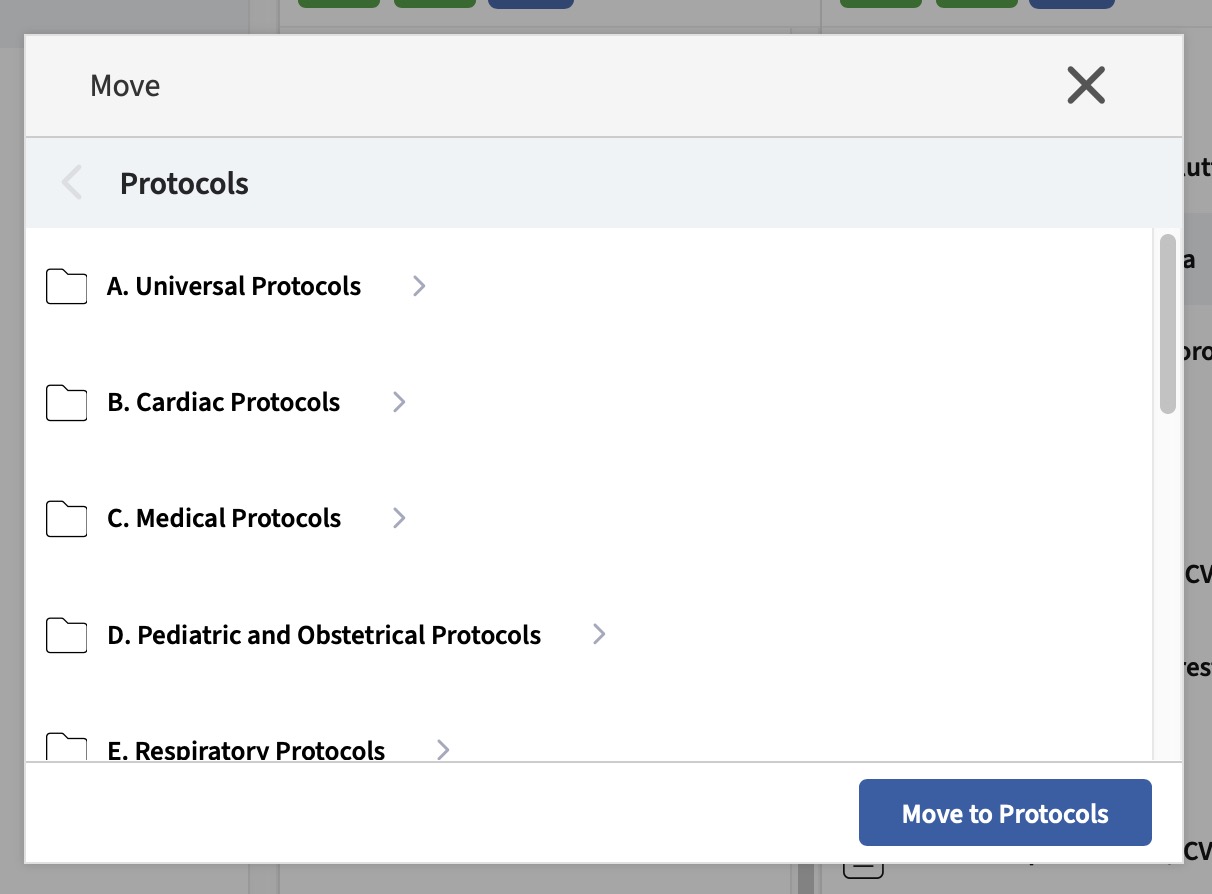
Navigate through the pop-up to the new folder you want the file to go and then press the “Move Here” button. The file will now appear in that new folder.
When you are finished with your edits, you can begin QA.
Beginning QA
Once you are done with your changes, press the blue “Begin QA” button. This will push the set to all users you have designated as “QA” users. They can serve as a second set of eyes to look over the changes and make any suggestions before you push the set out to all users.
If you realize that more changes are needed, you can select your QA set from the left hand side and press "Edit" again to create a new Edit set.
When you do this, you will then have three sets to pick from on the left hand side:
- The Published set is what is currently available to all your employees in the field.
- The QA set is what your current QA team has on their devices
- The new Edit set is a copy of the QA set for you to make changes in.
When everything is set and you push to QA again, it will erase the old QA set and replace it with the new one you edited.
Publishing a Set
When you and your QA users are satisfied with the changes, press the “Publish” button.
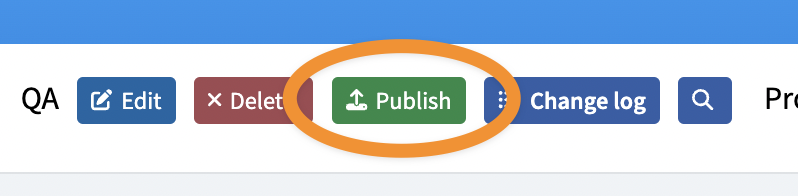
This will push the set out to all users and retire your previous set to the Archive folder. Your changes are now live and accessible to all verified users.
Sets may also be scheduled for future publishing.
All published sets are saved on the servers for 7 years, allowing you to access archived information to see what protocols were in effect on a given day.
Archived / Retired Protocols
On the left hand side, there is also an archive icon. If you click that you will see all of your prior updates.
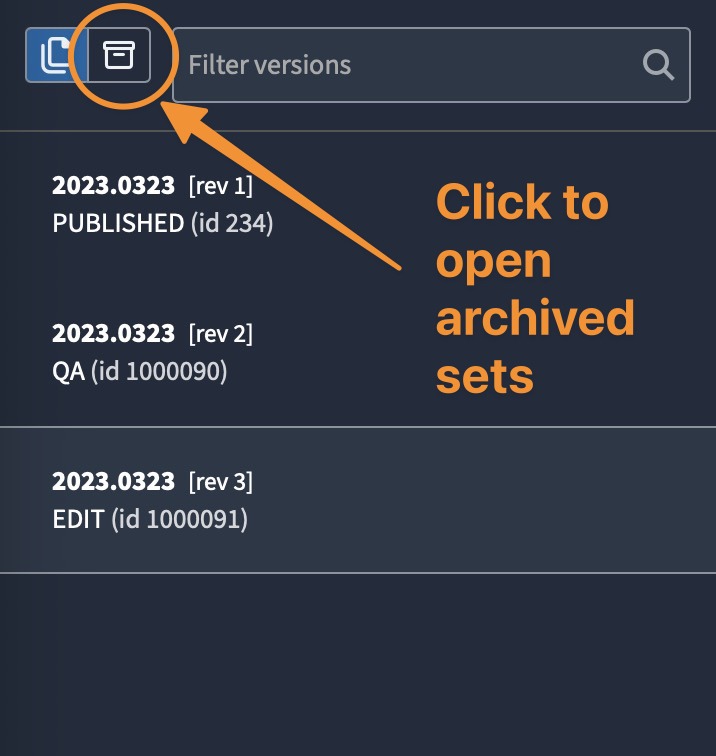
You can click on past updates and expand them just like the live set to see what changes have happened before.
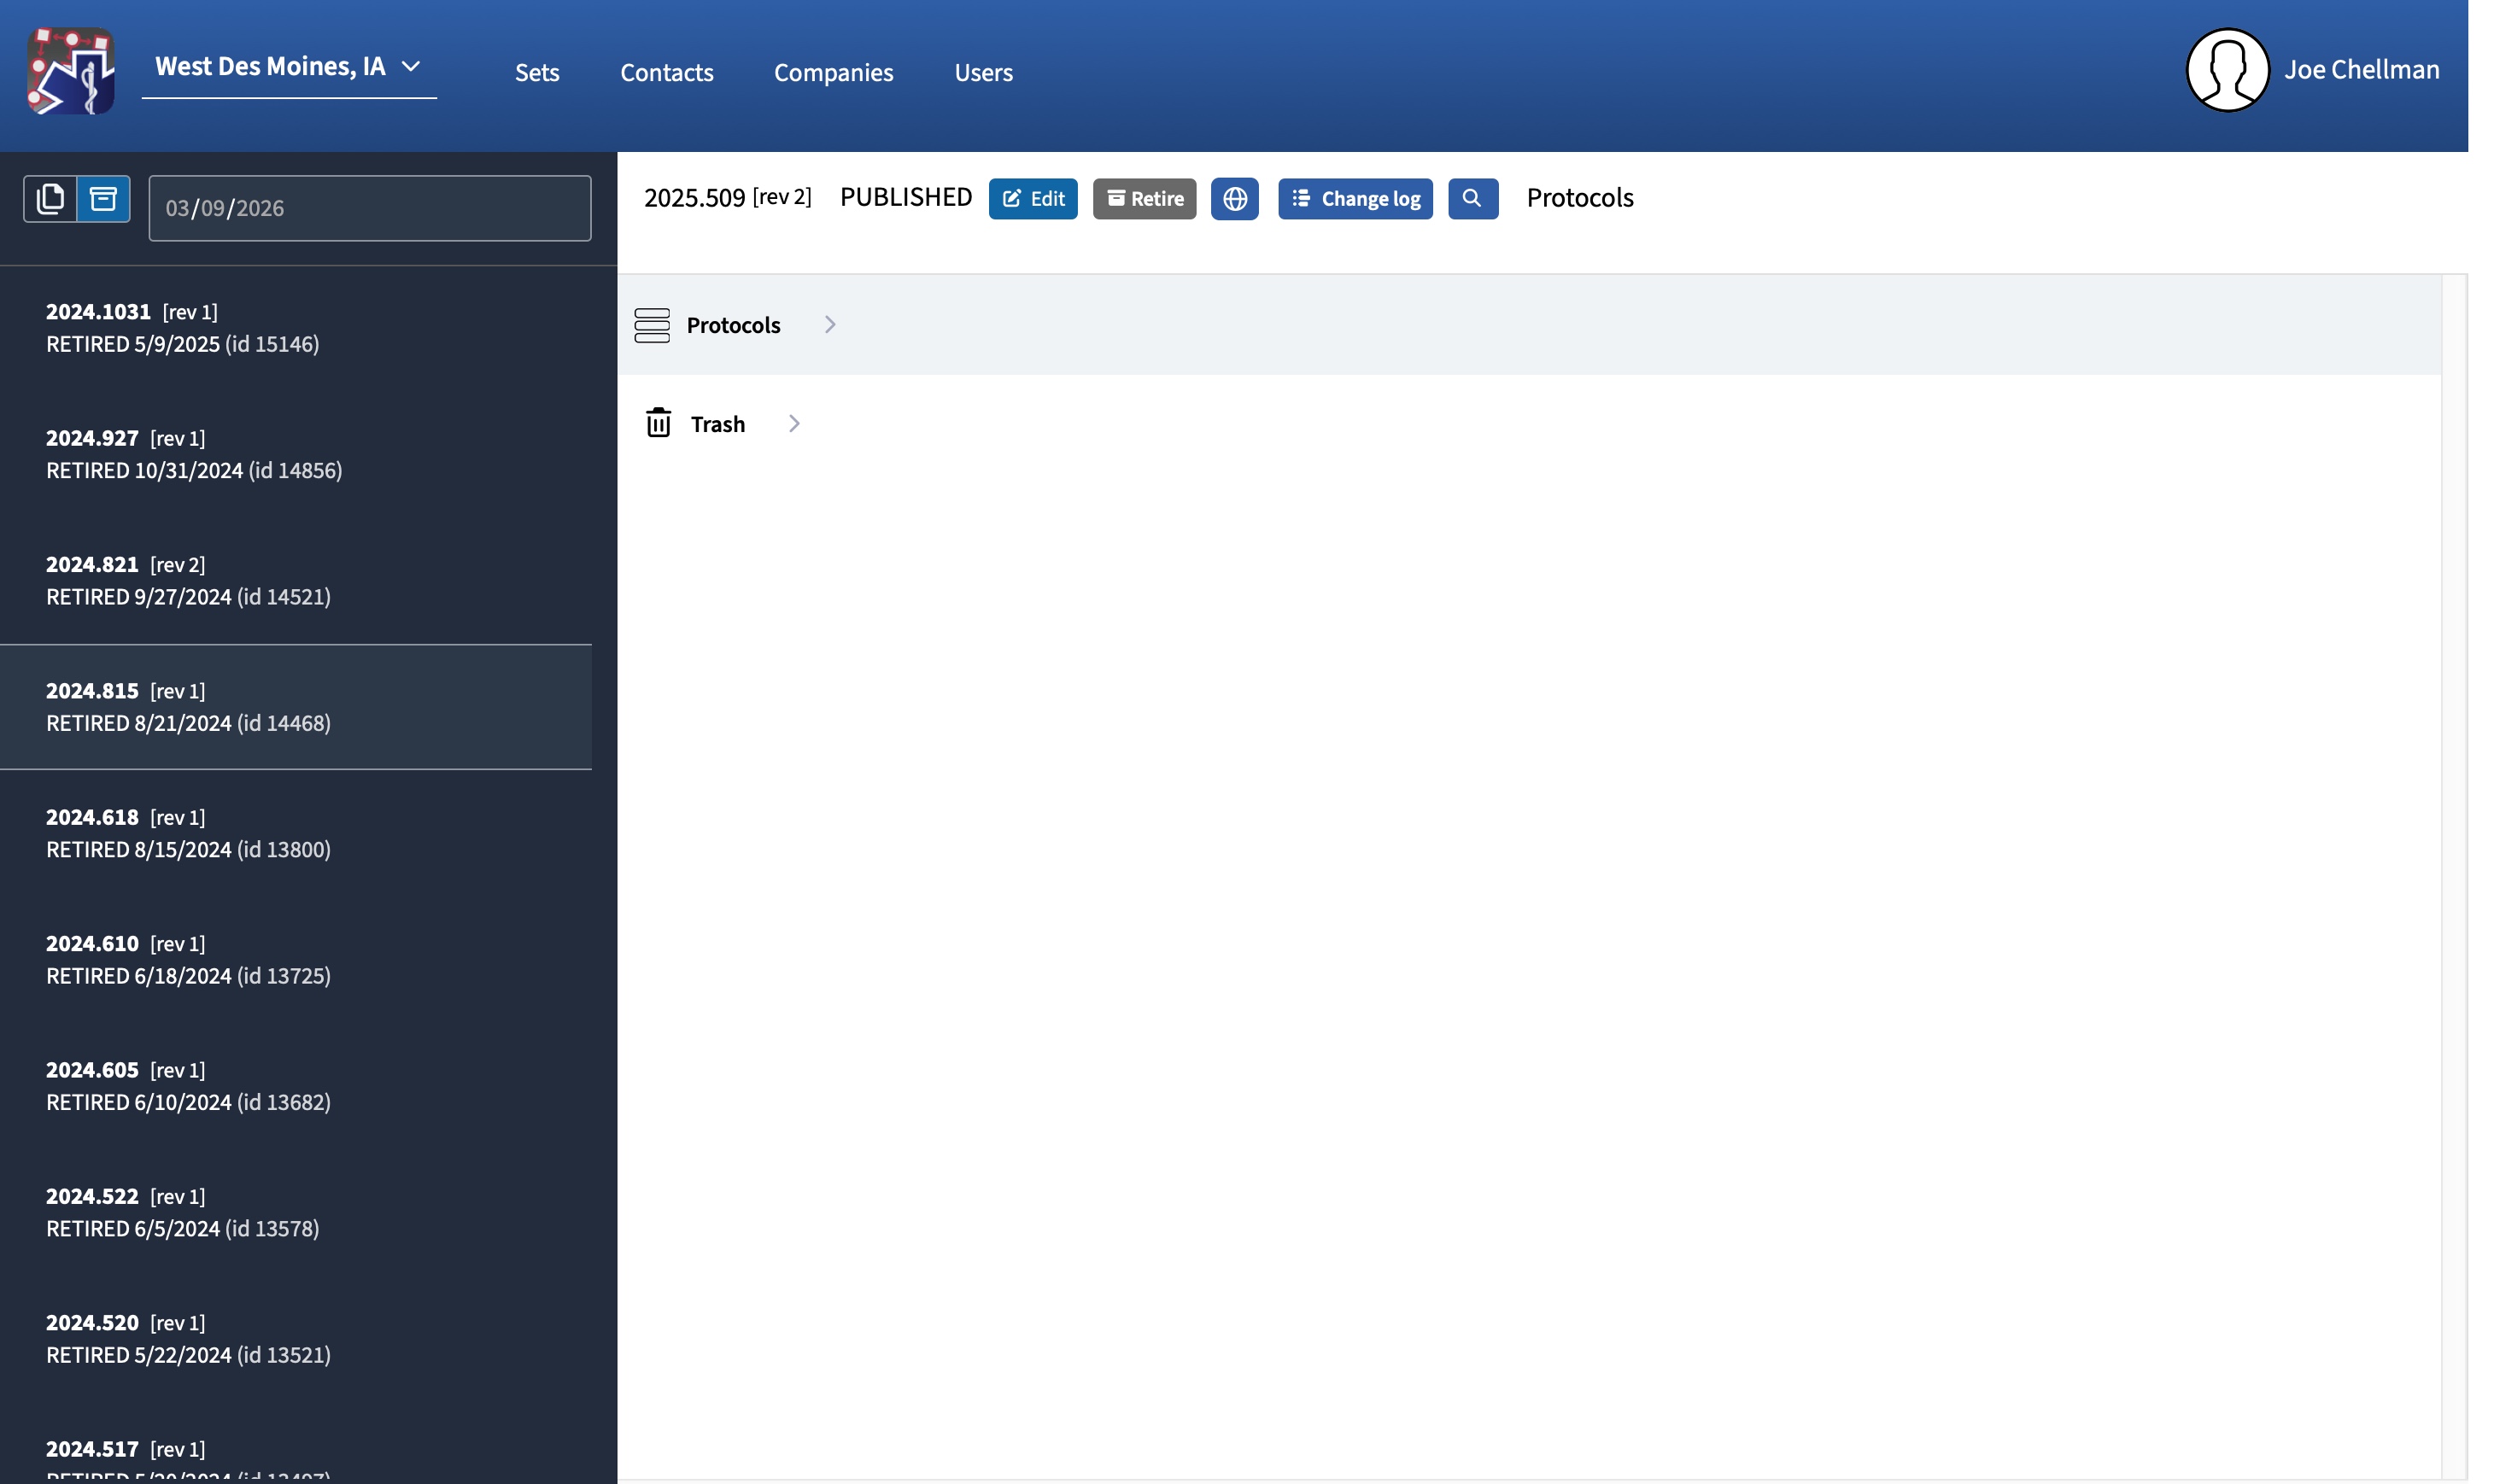
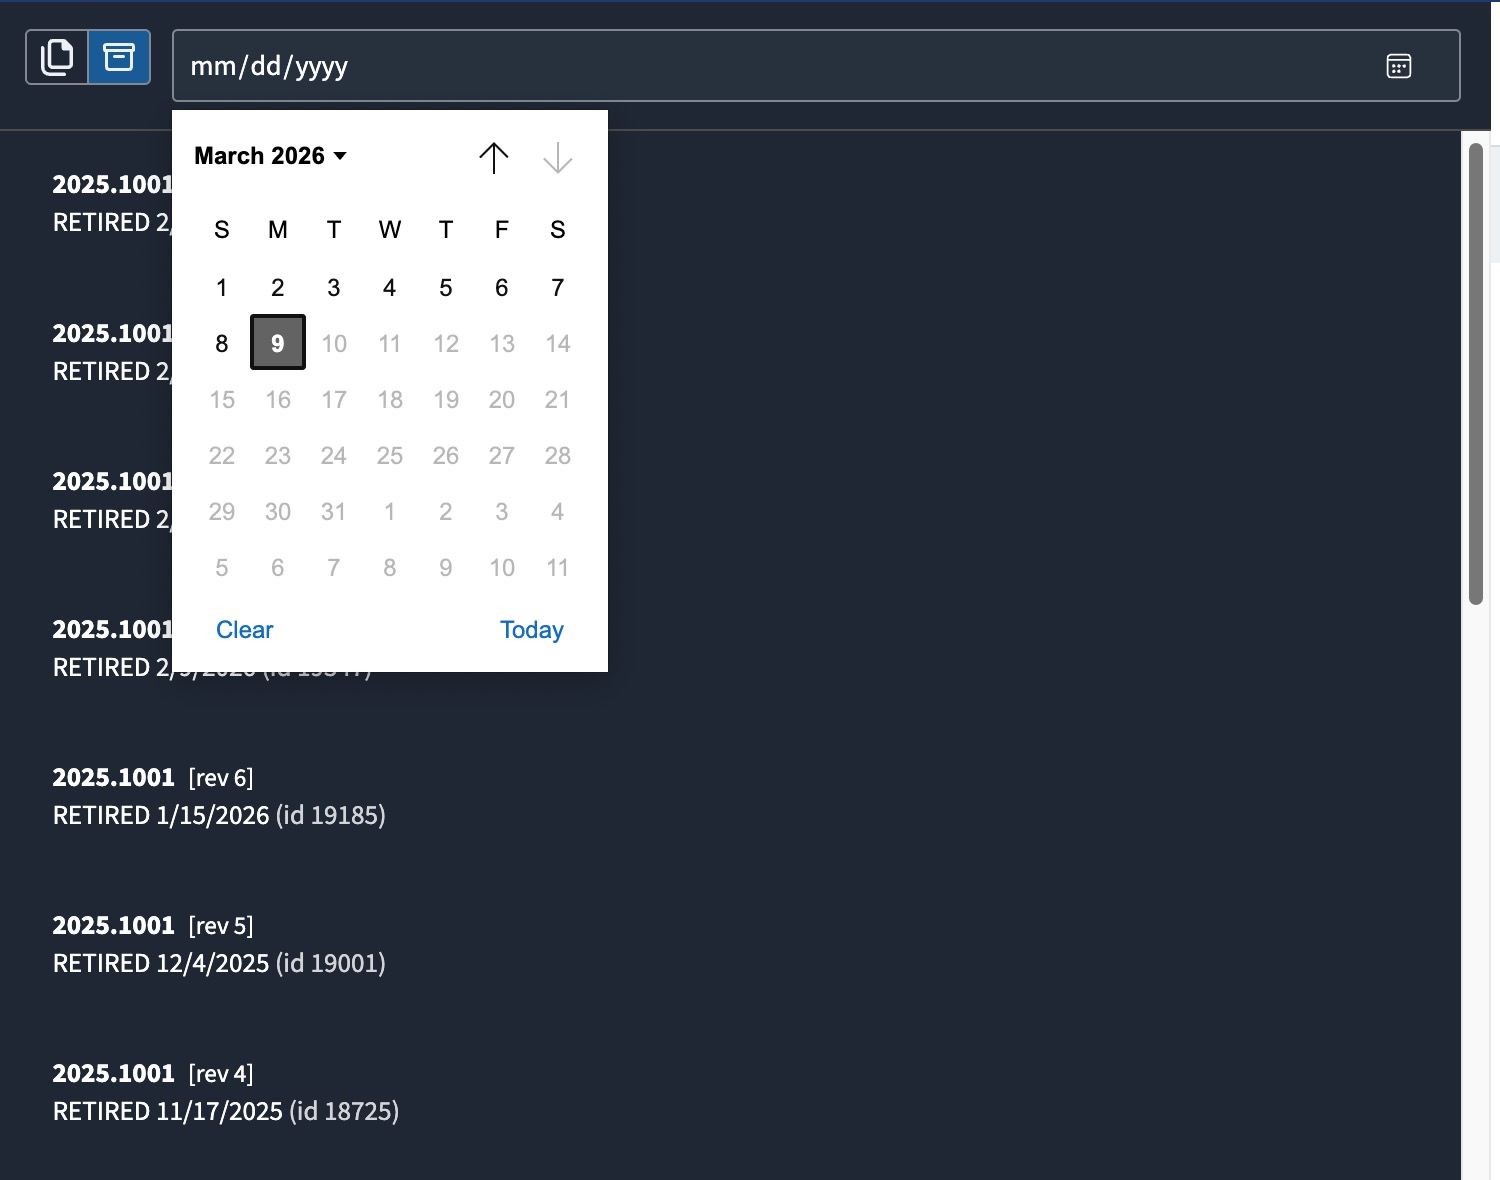
You can also use the search box to look at what protocols were in effect on a specific date. When you click on the box you will see a calendar and can scroll back with the arrows, or you can type in the date using the format displayed in the text box.

The archive will hold a record of all protocols published in the past 7 years.